Four formats come out of a modern iPhone, and they exist for different reasons.
HEIC: the default since iOS 11
Roughly half the file size of an equivalent JPEG at the same visual quality. It also carries 10-bit colour, transparency, and multiple images in one container - which is how Live Photos and some Portrait mode data are stored.
The trade is compatibility. Apple platforms handle it natively, Windows needs an extension, older software often refuses entirely, and plenty of upload forms reject it.
JPEG: universal and old
Nothing will fail to open a JPEG. It is also from 1992: 8-bit colour, no transparency, and about twice the file size for the same result.
Switch the camera to it with Settings → Camera → Formats → Most Compatible. Worth doing if you constantly send photos to people on other platforms, and not worth doing otherwise - because the storage cost is real and iOS already converts automatically when it matters.
That last point catches people out in a good way. AirDrop and Mail convert HEIC to JPEG when the receiving device cannot handle it. If your only problem is sending photos to one Windows user occasionally, you may not need to change the setting at all.
ProRAW: the one that is not a photograph yet
Available on Pro models, and a different thing entirely. A ProRAW file is sensor data plus Apple's computational processing, kept in an editable form - so highlight recovery, white balance and tone can be changed afterwards without the losses you get editing a JPEG.
The costs are substantial: 25 MB or more per photo against roughly 2 MB for HEIC, and every file needs editing before it looks its best. Straight out of the camera ProRAW looks flat, which is correct and surprises people.
Use it deliberately, for a shoot where you intend to edit. Leaving it on for everyday photos fills a phone in about a fortnight.
Live Photos: two files pretending to be one
A Live Photo is a still image plus a short video, stored together. Share it to something that does not understand the pairing and you get the still, which is usually what you wanted.
The thing worth knowing: the video half is why your library is larger than the photo count suggests. Turning Live Photos off for a holiday roughly halves what you shoot, and most people never look at the motion.
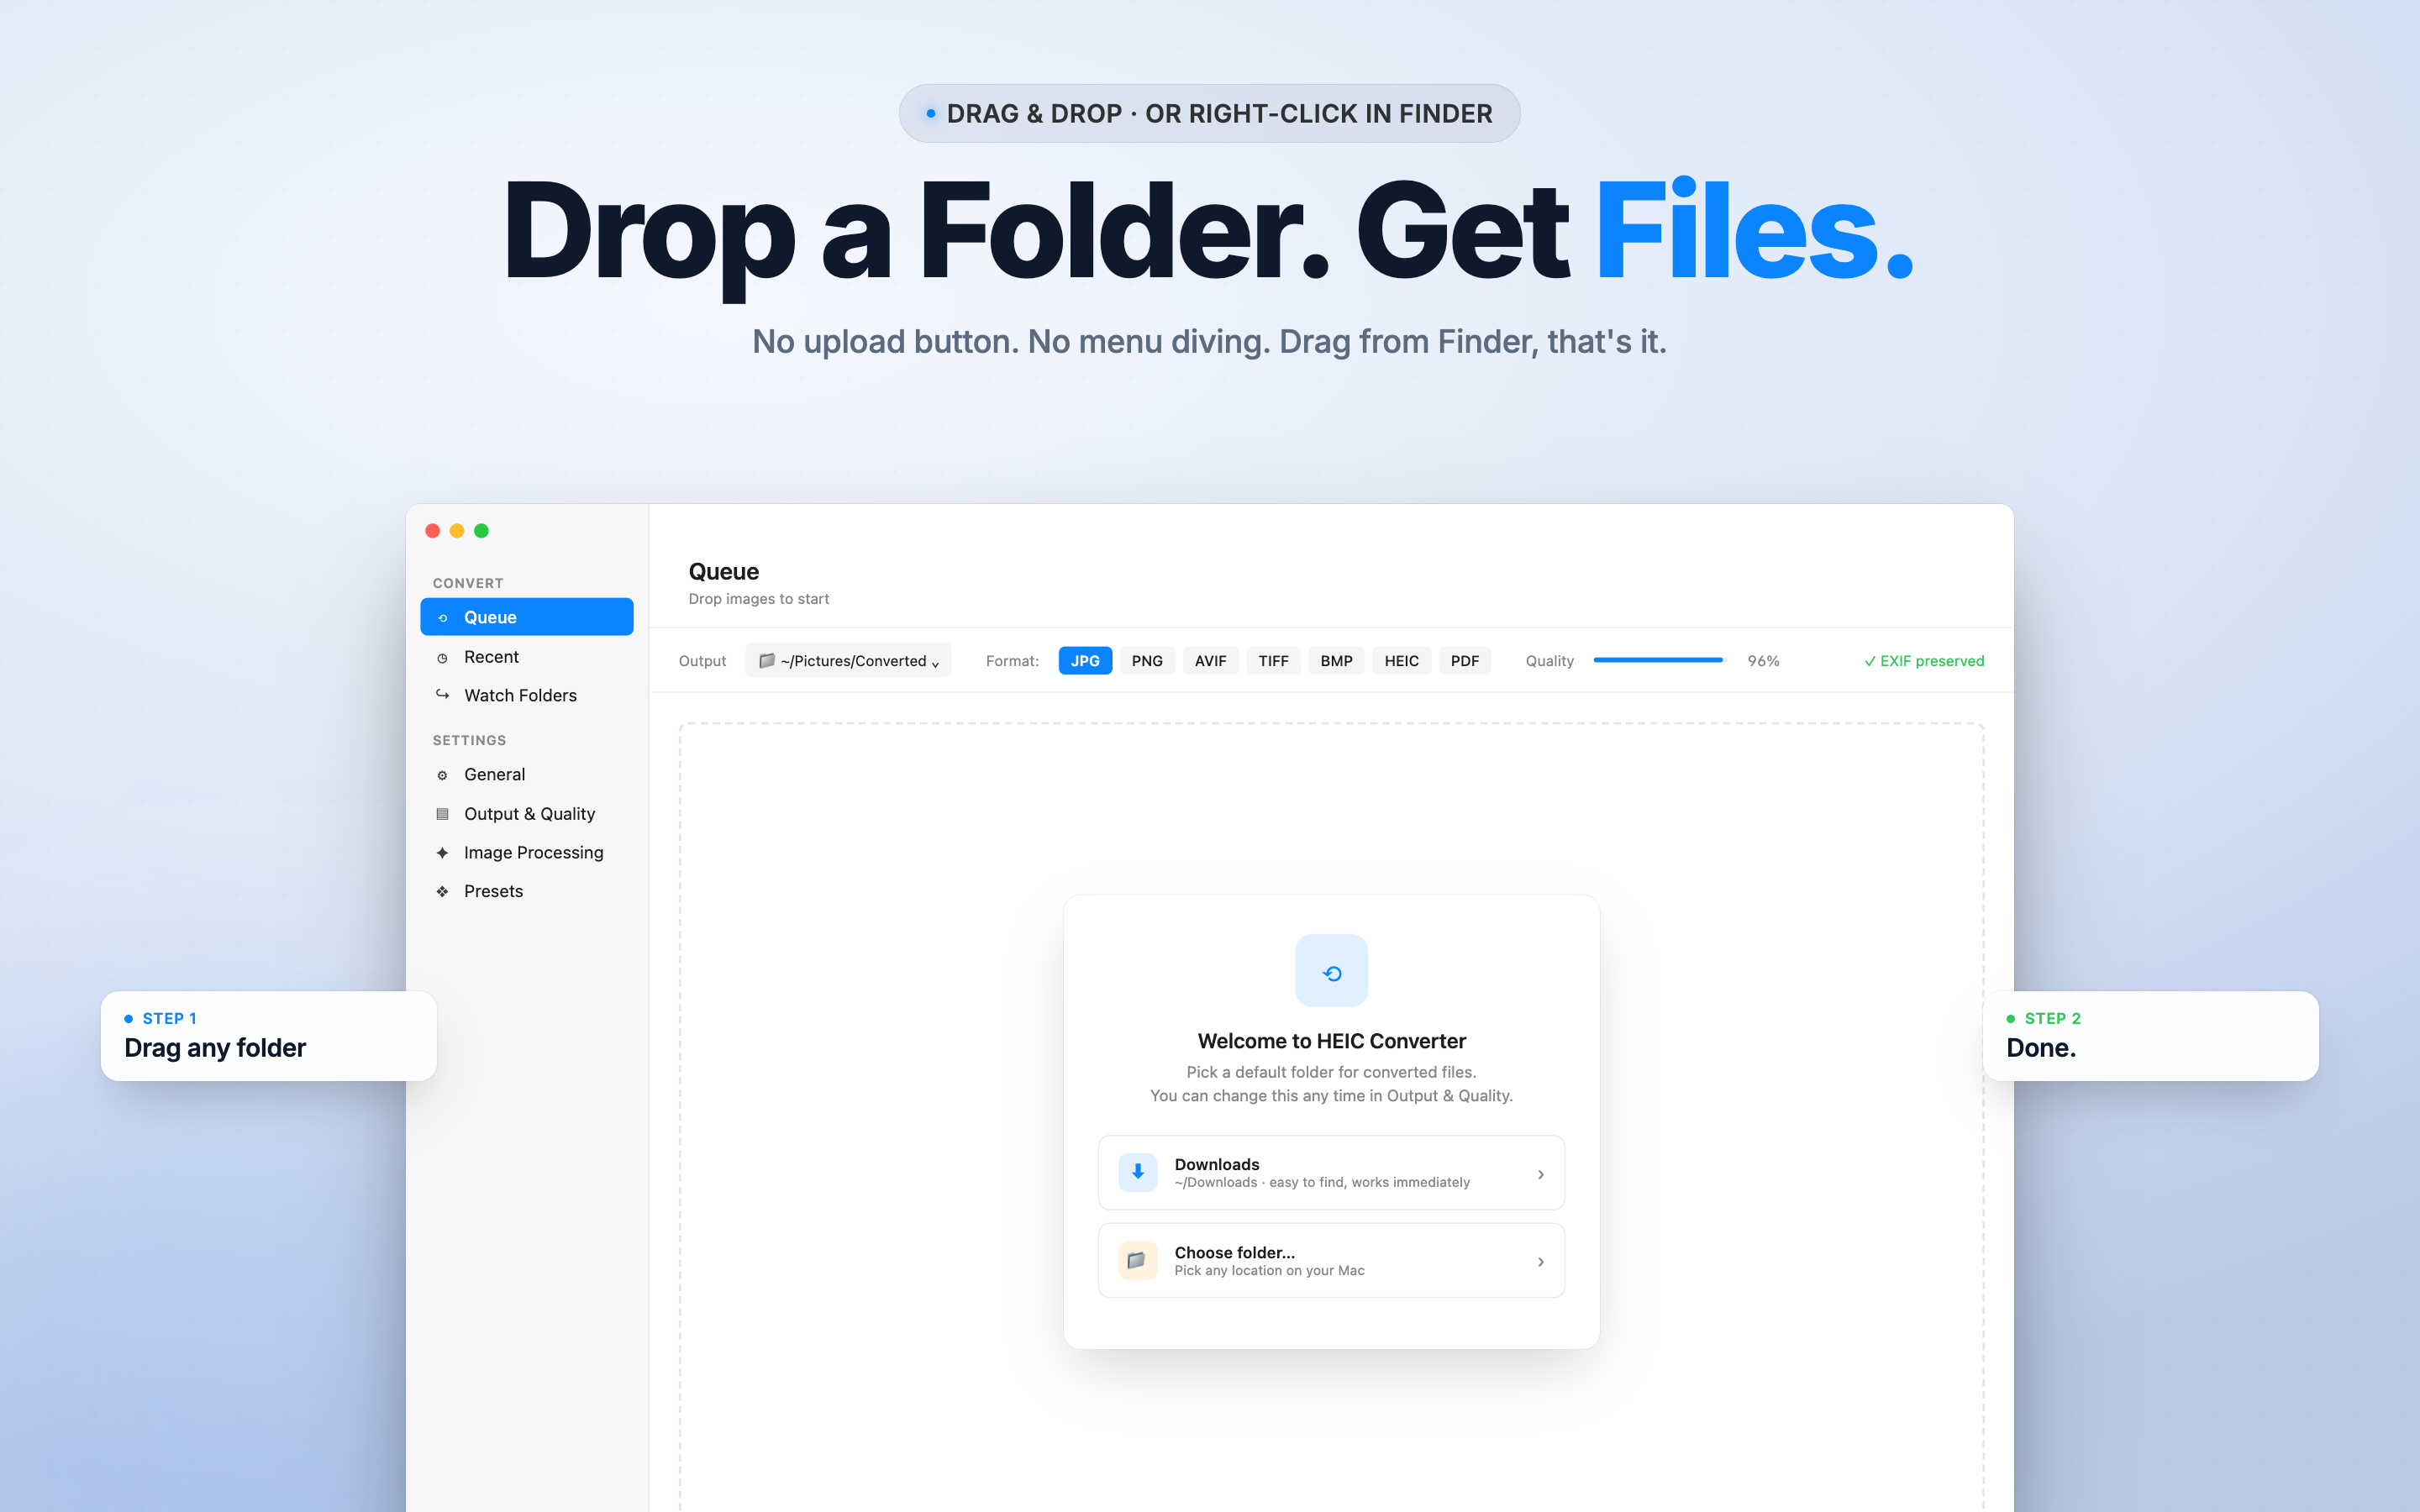
Converting without breaking your library
The most common damage happens here rather than in the camera. A conversion that drops EXIF produces files whose only date is the moment you converted them - so a decade of holidays lands on the same afternoon, in no particular place, and the images look identical.
Plenty of free web converters strip metadata as a side effect of how they process uploads. Uploading personal photographs to a stranger's server to convert them is also a choice worth making consciously.
HEIC to JPG Batch Converter works on folders on your Mac, keeps capture dates and camera data unless you choose otherwise, and nothing leaves the machine.
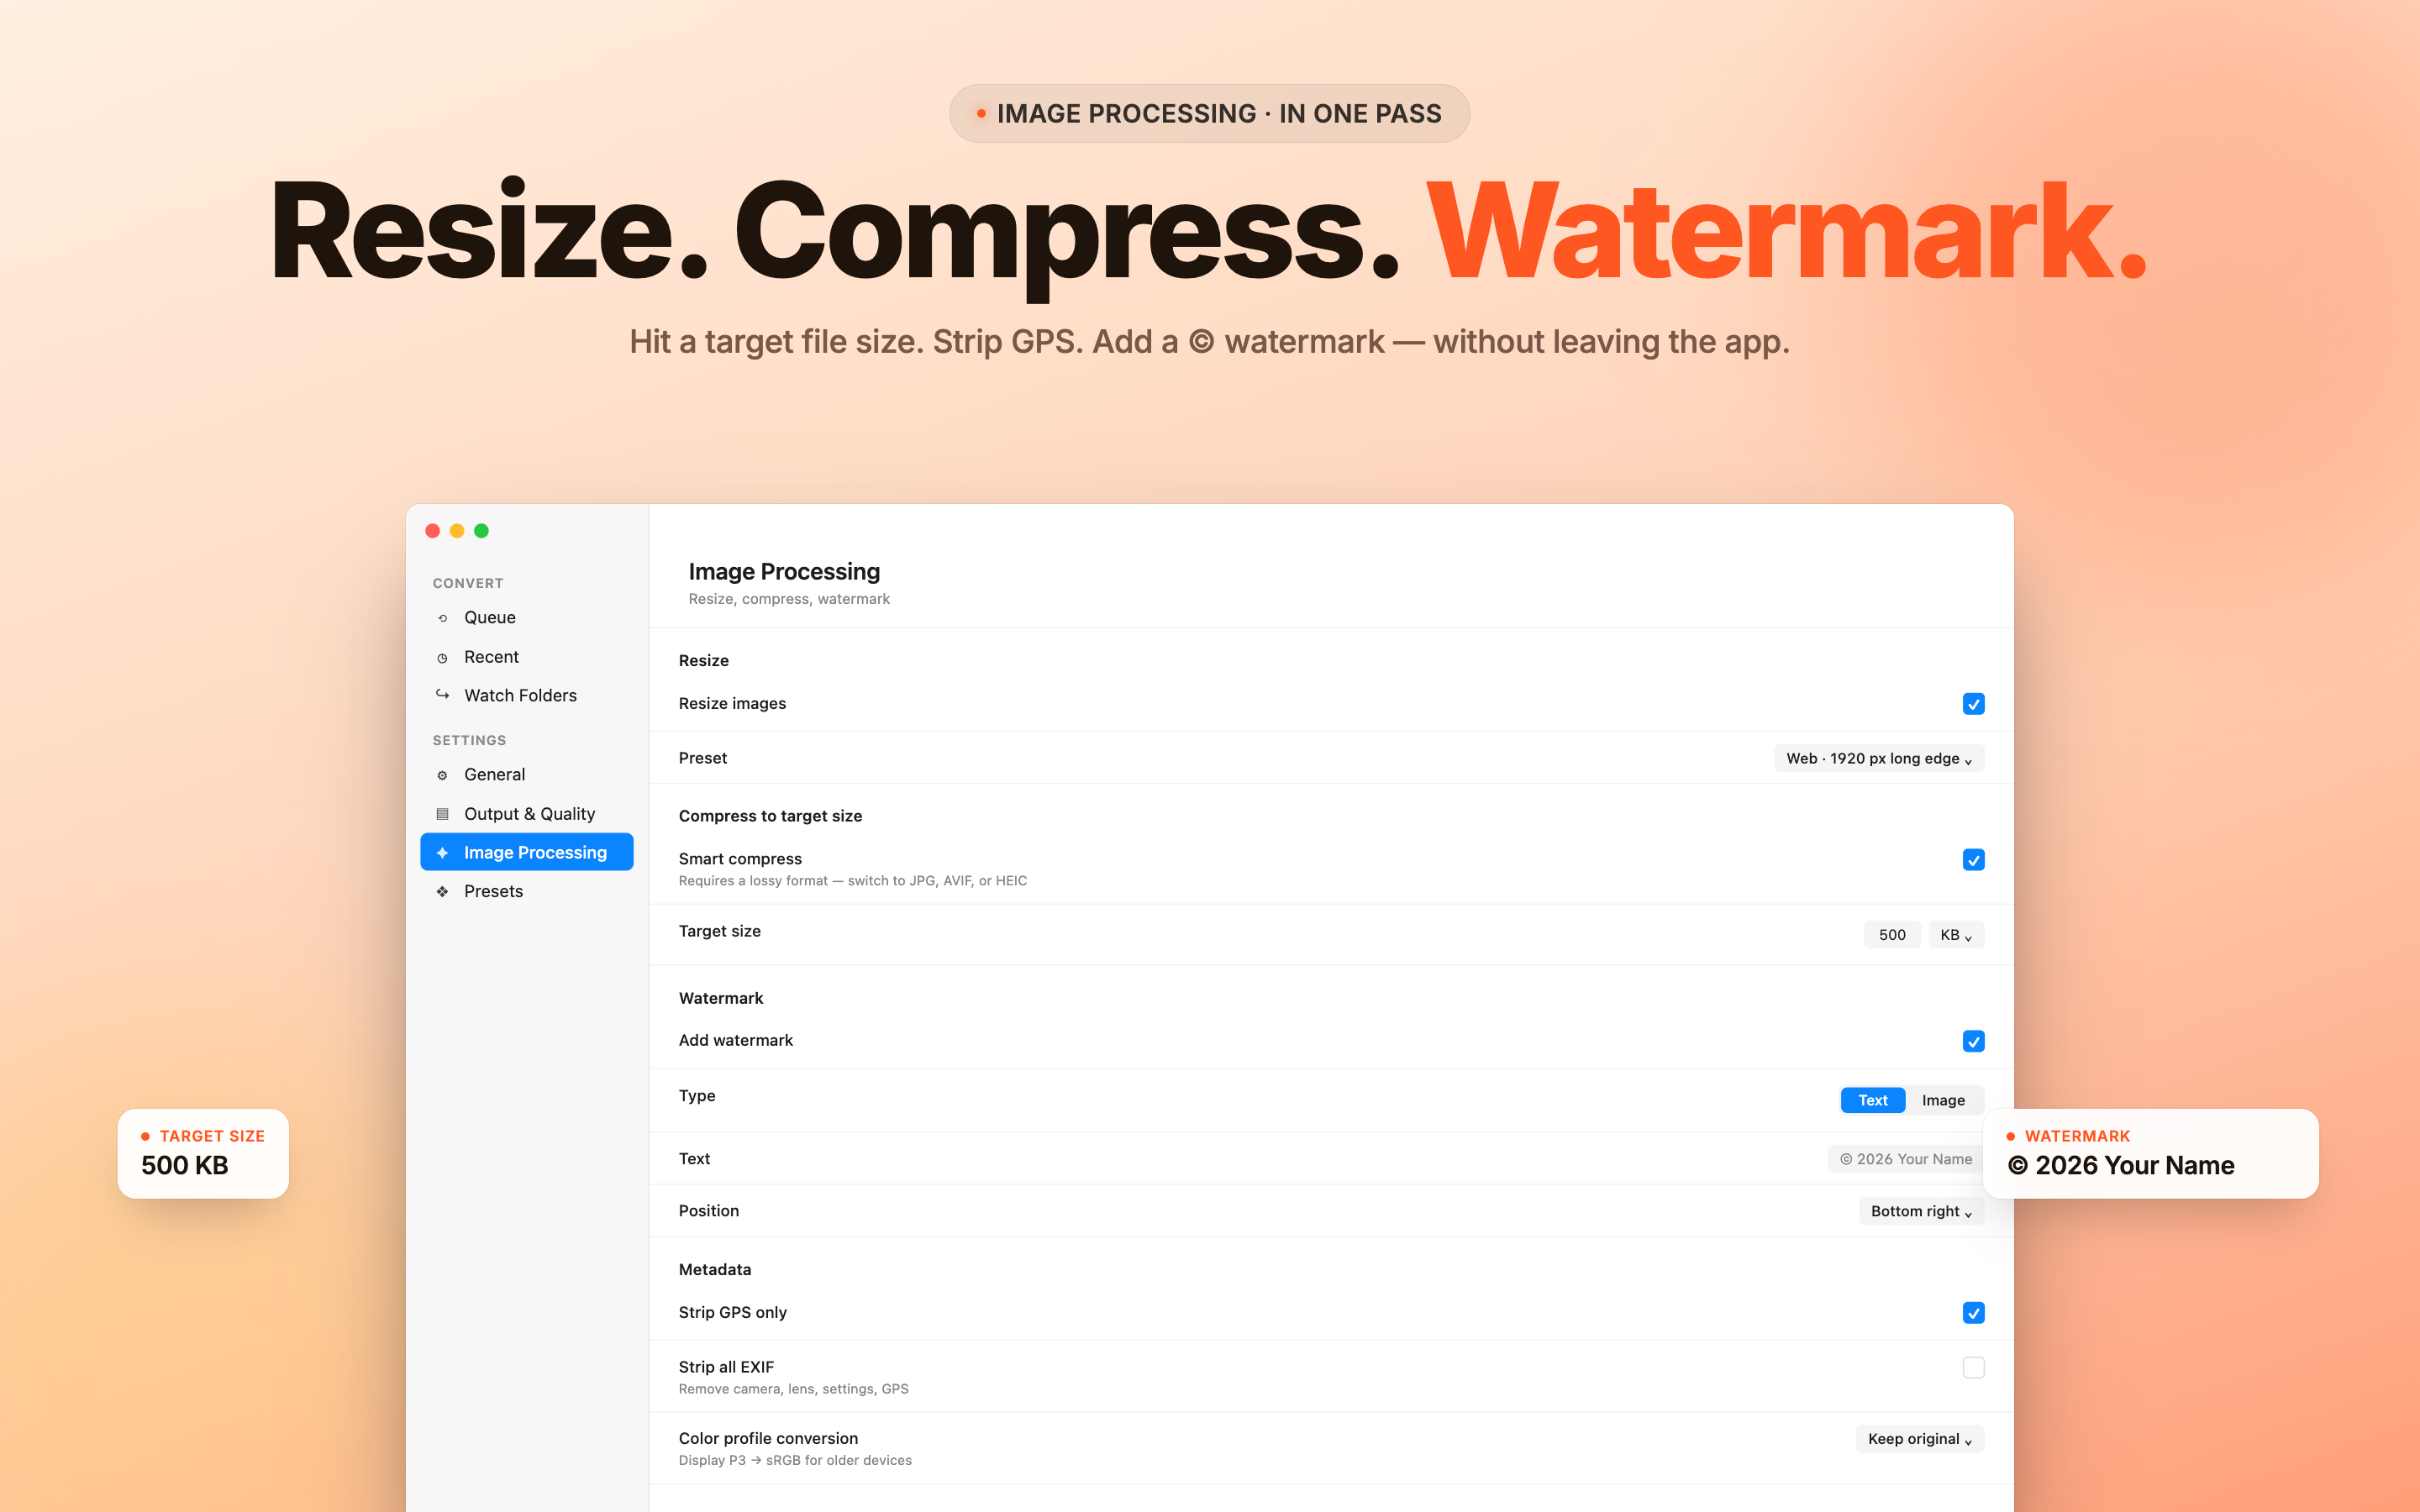
Location data, in both directions
Every photo carries GPS coordinates by default. Useful for organising, less useful attached to something you are about to post publicly - anything taken at home carries your address.
The right behaviour is a deliberate choice rather than a blanket rule: keep dates and camera data, and decide separately about location depending on where the file is going. A converter that gives you that switch is doing the job; one that silently picks for you is not, whichever way it picks.
A setup that does not need revisiting
- Camera on High Efficiency, so the library stays half the size.
- Live Photos off unless you specifically want motion.
- ProRAW off, and turned on for a shoot.
- Convert in batches when someone needs JPEGs, on device, with EXIF kept.
- Strip GPS only for photos going somewhere public.
We went further into the conversion side, including what quality settings actually cost you, in converting HEIC to JPG without wrecking your photos.